The post HOW TO COOK PINTO BEANS appeared first on Tastes so fine.
]]>
It’s very convenient to buy canned beans at the store, but to cook dried, bagged beans instead of canned is so easy and tastes much better, plus you can adjust the amount of salt that goes into them. Also, the smell of cooking beans in the house is pretty delicious, in my opinion!
This basic recipe is great for meal prep, too. It’s so easy to cook a batch of beans to make different dishes during a week.
Sometimes I like to eat them plain, like a simple bean soup. But most times I like to make refried beans with bacon, bean chipotle sauce for enfrijoladas, or to use in chili. There are many different ways to use and eat pinto beans, and I definitely hope to share some of my favorites here with you in the future. 

How to cook basic pinto beans
Ingredients
- 1 pound pinto beans $1
- 1/4 onion $.25
- 3 cloves of garlic $.50
- 1/2 tsp sea salt or chicken bouillon (add more to taste) .05
Instructions
- Sort the “bad” beans out (the ones that are broken or split).
- Rinse them.
- Place them in a large deep pot with the onion and garlic.
- Add warm water (about 6-8 cups of water).
- Cover the pot and bring to a boil. When it starts to boil lower the heat and let it simmer.
- Check the beans after 30 minutes to make sure they still have water. Add more water if needed and keep simmering. I usually keep my tea pot with warm water close in case I need it.
- The beans usually take about 1 1/2 hours to cook. Sometimes a little less than that.
- The beans are fully cooked when you can press them and they are soft to the touch. When the beans are cooked you can add the salt or chicken bouillon.
Notes
- Don’t add salt until the beans are fully cooked. They take longer to cook if you add the salt in the beginning.
- If you have never cooked beans before, check the beans every 30 minutes to make sure they don’t run out of water. It is a common mistake to leave them without water and burn them.

The post HOW TO COOK PINTO BEANS appeared first on Tastes so fine.
]]>The post Green Tomatillo Mexican Salsa (Salsa Verde) appeared first on Tastes so fine.
]]>Feel free to experiment with the quantity of jalapeños and tomatillos. Add as little or as much as you like. I usually cook several jalapeños, some with seeds and veins and some without. The whole ones I like to add one at a time and taste in between to make sure it is not too spicy.
This salsa is good for tacos, tamales, chicken, pork, carnitas, and many more dishes, or to just use as a dip for corn tortilla chips.


Green Tomatillo Mexican Salsa
Ingredients
- 1 pound tomatillos
- 3 cloves of garlic
- 1/4 onion
- 1-6 jalapeños
- bunch of cilantro
- 1/2 tsp salt or chicken bouillon (or more to taste)
Instructions
- Take the seeds and veins off of some or all of the jalapeños depending on how spicy you like it. (I usually keep about 3 with seeds and veins and add one at a time until I like it).
- Place all of the ingredients in a pot.
- Cover with water and bring to a boil until the tomatillos change color.
- Blend with 1/2 teaspoon of salt or chicken bouillon. (Don’t add all of the jalapeños with seeds and veins until you taste the spiciness).
- Taste and adjust flavor. Add more jalapeños if desired and blend again.
Notes

The post Green Tomatillo Mexican Salsa (Salsa Verde) appeared first on Tastes so fine.
]]>The post Quick and Easy Orange Soy Chicken Thighs from Frozen (On the Instant Pot) appeared first on Tastes so fine.
]]>This is my very first dish cooked in my new Instant Pot, and I’m happy to say it was a success!
After reading all of the Instant Pot directions, I still wondered if cooking completely frozen chicken would really and truly taste as good as a thawed, traditionally-cooked version of the same recipe. Well, there is only one way to find out, so I started cooking.

First, I browned some onion with the sauté setting, followed by a lot of minced garlic. Then I added a completely frozen solid block of about 8 chicken thighs! I seasoned the frozen chicken brick generously with salt, pepper, and garlic salt (yes, on top of the minced garlic). Finally, I added the honey, soy sauce, orange juice, a splash of sesame oil, and a few drops of sriracha.
I closed the lid, making sure the steam pressure valve was turned to the “sealing” position, and pressure-cooked for 25 minutes.

After the 25 minutes was up, I did a “quick release” of the steam, and DONE! The chicken that started less than half an hour earlier as a frozen block was now soft, tender, flavorful and delicious! I served it over cauliflower rice and the pairing was perfect.
After breaking down the prices for this recipe it turned out to be around $1.89 – $2.53 per serving depending on how much you like to eat. The price I spent on the chicken might be a little high because I use organic. Keep in mind prices can vary according to the area you live in. Use this as an average/estimate.
Enjoy!


ORANGE SOY CHICKEN THIGHS (ON THE INSTANT POT)
Ingredients
- 2 pounds skinless boneless chicken thighs (can be frozen) $ 11.98
- 1/4 diced red onion $ .30
- 3 cloves of garlic $ .25
- 1/4 cup honey $ .90
- 1/3 cup soy sauce $ .65
- 2/3 cup orange juice $ .78
- 1 tsp sesame oil (or more to taste) $ .07
- sriracha optional
- garlic powder to taste $ .05
- salt to taste $ .05
- pepper to taste $ .05
Instructions
- Turn your Instant Pot’s sauté setting on for about 3-5 minutes.
- Add the diced onions and sauté while stirring until translucent.
- Add the frozen chicken thighs, then generously season on both sides with garlic powder, salt and pepper to taste. Add with the honey, soy sauce, orange juice, sesame oil, minced garlic cloves, and sriracha.
- Lock the lid and make sure the steam release handle is in the sealing position.
- Pressure cook for 25 minutes.

The post Quick and Easy Orange Soy Chicken Thighs from Frozen (On the Instant Pot) appeared first on Tastes so fine.
]]>The post Warm and Cozy Cocoa Oatmeal appeared first on Tastes so fine.
]]>Budget-wise, can you believe this recipe is only 67 cents per serving!?!?
My favorite fruit to add to this chocolatey oatmeal is banana, but you could also add strawberries, raspberries, or blueberries if you prefer. Have fun experimenting, customizing for your own tastes, and enjoy!


Warm and Cozy Cocoa Oatmeal

Perfect for a cold winter morning’s breakfast while you cozy up by the fire and listen to some soothing music, this is a quick and easy, warm and nourishing breakfast treat that’s like having a morning dessert.
$1.34 Per recipe
$.67 Per serving
- 1 cup old fashioned oats ($.26)
- 2 cups water
- 1 tbsp unsweetened cocoa powder ($.06)
- 1 tbsp maple syrup ($.29)
- 1 tsp vanilla extract ($.30)
- cinnamon to taste ($.05)
- pinch salt ($.05)
- 1 banana (1/2 per person) ($.21)
- 1 tbsp peanut butter (1/2 tbsp per person) ($.012)
-
Add the first 7 ingredients to a sauce pan and stir.
-
Bring to boil over medium heat stirring occasionally.
-
Serve and top with 1/2 a banana plus 1/2 tbsp per plate.
-
Enjoy!
The calories listed are with exact measurements of this recipe. You can customize it according to your own preferences and dietary restrictions. Add as much sugar and fruits as you desire.
The post Warm and Cozy Cocoa Oatmeal appeared first on Tastes so fine.
]]>The post AUTUMN PEAR SALAD WITH CANDIED PECANS appeared first on Tastes so fine.
]]>

The total price I payed for this recipe was $16.53 as a main dish salad for 4 people. That comes out to $4.13 per serving! Since I like to make my life as easy as possible, I buy ingredients that are ready to use like pre-washed lettuce, pre-crumbled goat cheese, and chicken from Trader Joe’s that is already packaged individually. It’s not always the cheapest option, but when in a rush, this is how I do it.

I’m sure you can make this recipe a lot more affordable by washing your own lettuce, or buying bulk goat cheese and chicken at Costco or other discount grocery stores.
I hope you enjoy it!

Autumn Pear Salad with Candied Pecans
Price for recipe: $ 16.64
Price per serving: $ 4.16
SALAD
- 5 ounces mixed baby lettuce ($ 2.49)
- 1/2 cup candied pecans ($ 1.40)
- 4 ounces crumbled goat cheese ($ 2.49)
- 2 pears (bartlett are my favorite) ($ 1.78)
DRESSING
- 1/4 cup extra virgin olive oil ($ .63)
- 2 tbsp white modena vinegar ($ .60)
- 1 tbsp dijon mustard ($.15)
- 1 tbsp honey ($ .22)
- 1/4 tsp black pepper ($ .05)
- 1 minced shallot (optional) ($ .25)
CHICKEN
- 2 boneless skinless chicken breasts (cooked, in cubes) ($ 6)
- salt and pepper to taste ($.05)
- 1 tbsp cooking oil ($.16)
CHICKEN
-
For the chicken, I like to cut it in cubes, season with salt and pepper to taste, put in on a skillet over medium high heat with 1 tablespoon of oil until fully cooked. You could also grill it and cube it.
DRESSING
-
Place all dressing ingredients in a jar, cover, and shake well.
SALAD
-
Chop the pecans.

-
Place a bed of lettuce in a salad bowl, top with remaining salad ingredients, drizzle with a little bit of the dressing and enjoy.

The post AUTUMN PEAR SALAD WITH CANDIED PECANS appeared first on Tastes so fine.
]]>The post CHARDONNAY CHICKEN FETTUCCINE ALFREDO appeared first on Tastes so fine.
]]>
This Chardonnay Chicken Fettuccine Alfredo is great when I’m craving restaurant-quality pasta. I had been wanting to go to the restaurant specifically for this dish, but realized that I would have to spend $12.99 per person and that’s without taking into account the drinks, tips and taxes. By making it at home I spent only $8.94 for the entire recipe that feeds 4 people!

I have decided to start sharing how much we spend per meal because it helps us stay motivated to achieve our goals. Every time I break down the prices, it helps me to stay on track with my monthly budget and diet, so hopefully it will help you, too.
Now back to the delicious restaurant-quality Chardonnay Chicken Fettuccine Alfredo! This dish is simple and soooo yummy, with a creamy sauce accentuated by the wine. I’ve tried this recipe with different wines and have to say that the Chardonnay adds the most flavor. I thought that maybe a sweet wine like Moscato would give it a nice sweet touch, but actually it doesn’t pair as well with the cream and cheese. To me, it just tasted a little bland. Not that it tasted bad or anything, just not as rich in flavor as when using Chardonnay.
The beauty of a simple pasta dish like this is that it really allows you to make it yours, adding your own special touches (mushrooms, for example, or extra seasoning), so have fun with it and enjoy!

Chardonnay Chicken Fettuccine Alfredo

Price for recipe $8.94
Price per serving $2.23
FETTUCCINE
- 8 oz fettuccine ($1)
- 1 tbsp butter ($.20)
- 1 tbsp vegetable oil ($.05)
- 1 pound chicken breast ($4)
- 1 shallot minced ($.25)
- 1/2 cup chardonay ($.5)
- 2 cups heavy cream ($2)
- 1 cup freshly grated parmesan cheese ($.79)
- salt to taste ($.05)
- pepper to taste ($.05)
GARNISH
- fresh parsley ($.50)
PASTA
-
Cook the pasta according to the package. Season the water with a lot of salt.
-
When pasta is cooked. Reserve 1 cup of pasta water in case you need it. (See note #1)
CHICKEN ALFREDO
-
Season the chicken breasts with salt and pepper to taste.
-
Cook them on a skillet over medium high heat with 1 tbsp of butter and 1 tbsp vegetable oil.
-
Take them out when done, slice them and reserve.
-
In the same skillet add the shallot and cook until translucent. About 2 minutes.
-
Turn the heat to medium low and add the heavy cream and grated parmesan cheese.
-
Let it simmer until cheese melts.
-
Add the cheese and toss.
-
Add the fettuccine and toss. Let the pasta simmer in the sauce for about a minute or two to soak all flavors.
-
Garnish with parsley and serve.
- If the pasta gets too thick add pasta water in increments of 1/4 cup until you like the consistency.
- For leftovers do not microwave this dish. To reheat, put it on a pan over low-medium heat until it starts to warm. Add pasta water, milk, or half and half in increments of 1/4 cup until you like consistency. Add extra cheese if you have it.
The post CHARDONNAY CHICKEN FETTUCCINE ALFREDO appeared first on Tastes so fine.
]]>The post CHIPOTLE MEXICAN MEATBALLS appeared first on Tastes so fine.
]]> I hope you and your family enjoy this tasty, filling, nice cheap and easy recipe as much as I do!
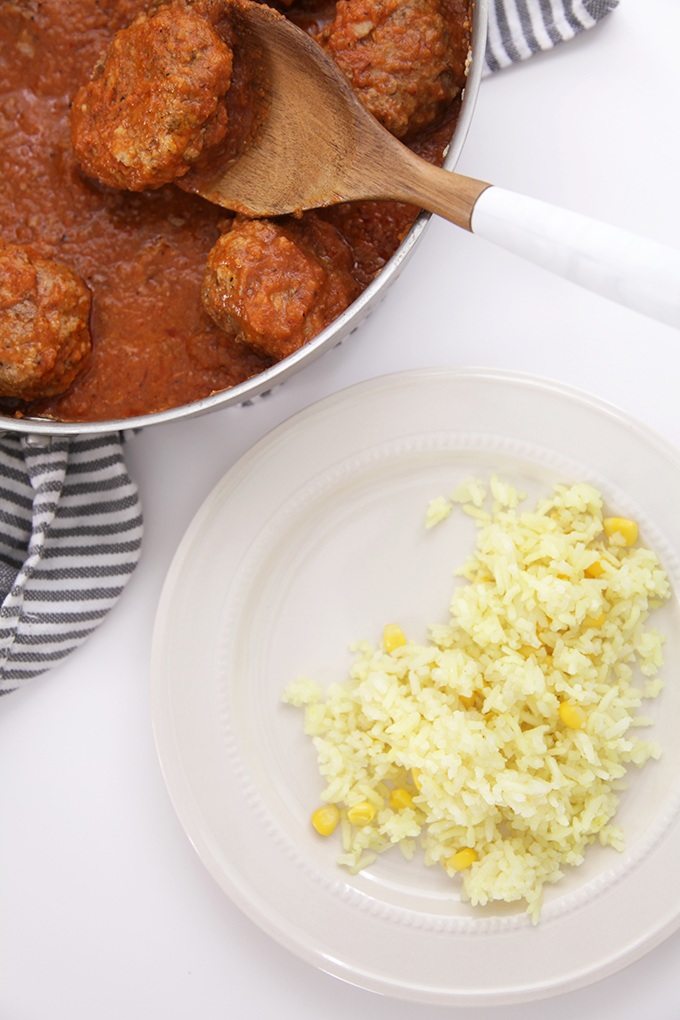
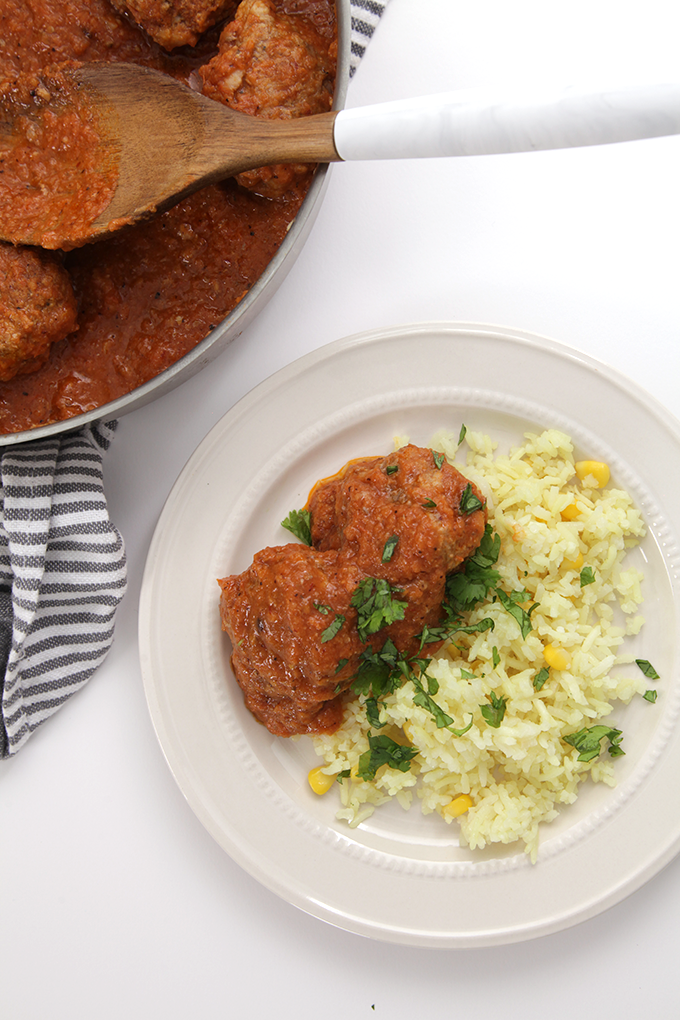
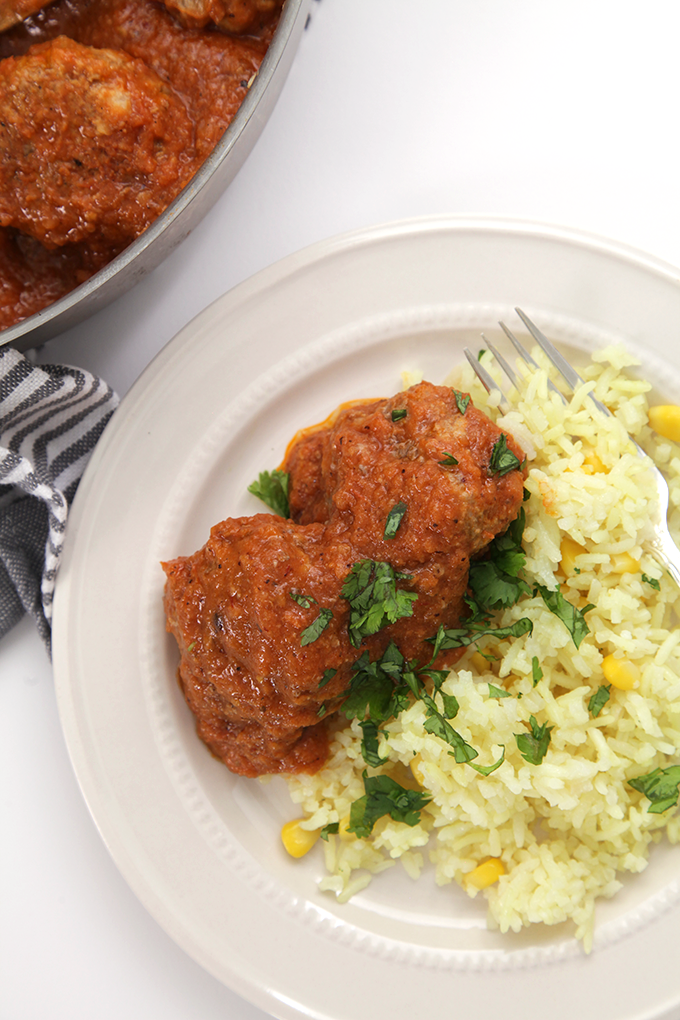
Chipotle Mexican Meatballs

Price for recipe: $9.47
Price per serving: $2.36
CHIPOTLE SAUCE
- 4 roma tomatoes ($1.16)
- 2 garlic cloves with peel on (Note 1) ($.09)
- 1/4 onion ($.19)
- 1 chipotle in adobo ($.10)
- 1 tbsp maseca ($.05)
- 1/2 cube chicken bullion ($.09)
MEATBALLS
- 1 pound ground beef meat ($3.99)
- 1/2 pound ground pork meat ($2.22)
- 3 slices white sandwich bread (no crust) ($.50)
- 1 small onion ($.39)
- 2 garlic cloves ($.09)
- 1 egg ($.20)
- 2 tbsp milk ($.05)
- 3/4 tsp salt ($.05)
- 1/4 tsp pepper ($.05)
GARNISH
- cilantro ($.25)
TO PREPARE THE SAUCE
-
Place the tomatoes, onion and garlic in a dry iron skillet over medium high heat. Roast them until you get a nice dark coating on all sides.
-
Take the peel off the garlic cloves and place in a blender with the tomatoes, onion and the rest of the sauce ingredients.
-
Blend until smooth and reserve.
MAKE THE MEATBALLS
-
Roughly cut the onion in big chunks and place them in a food processor with the 2 garlic cloves. Chop until you get very fine pieces.
-
Cut the crust off the bread and discard it. Dice the bread and place them in a big container.
-
Coat the bread with the Milk. Add onion/garlic mixture with all juices. Let the bread absorb all liquids.
-
Add remaining meatball ingredients to the bowl and mix with your clean hands.
-
Form meatballs.
PUT IT ALL TOGETHER
-
Add the sauce into a big frying pan over medium high heat.
-
Immediately add the meatballs into the sauce.
-
Bring the sauce into a simmer and cover the pot.
-
Cook the meatballs for about 20-30 minutes or until the meatballs are fully cooked.
-
Enjoy with Mexican white rice, it’s my favorite way to accompany this dish. and Garnish with a little cilantro.
- Make sure you leave the peel on the garlic while roasting it to prevent it from burning. Burned garlic is not very pleasant to taste. After you roast it and get a nice color on the peel, take it off before transferring to blender.
The post CHIPOTLE MEXICAN MEATBALLS appeared first on Tastes so fine.
]]>The post THE MOST DELICIOUS SOUTHERN CORNBREAD RECIPE EVER appeared first on Tastes so fine.
]]>
In my native Mexico, cornbread is very different than it is in the United States. There, it’s more like a dessert bread- very sweet with sugar and sometimes has a milky caramel sauce drizzled on top. In the US, especially in the South, it’s typically a side bread served with a meal, just like a roll, toast, or biscuit.
I have to be honest: I have never been a fan of cornbread. To me, it was always one of those foods that look or smell better than it actually tastes. Sometimes I’ve been disappointed when I bite into a piece of cornbread and, almost as expected, like I should have known better, it’s pretty dry and just doesn’t have much flavor to it at all- very bland. I feel like I was tricked into eating it because it actually smelled really good, but then I have to drink a tall glass of water just to wash it down because it’s so dry.
Well, never again! This truly is the most delicious, easy-to-make Southern-style cornbread recipe ever, and I can honestly say that it really tastes as good, if not better, than it looks– moist, buttery, soft, with the perfect sweet and salty combination, thanks to the naturally-sweet corn (no added sugar).

I was first introduced to this recipe by my mother-in-law, who is an amazing, authentic Southern-cooking Mama It goes great on the side with soups, stews, chili dishes, and any other meal that could use a good side bread, or just enjoy it by itself as a snack.
It’s completely optional, but I’ve chosen to add a little kick with small bits of poblano and red peppers. Feel free to add your own favorite peppers (jalapeños would be great), or just omit if peppers aren’t your thing. I promise, the cornbread just by itself is amazing. Enjoy!

- 1 1/2 cups of self rising cornmeal
- 2 eggs
- 1 cup creamed corn
- 1 cup sour cream
- 1/2 cup vegetable oil
- 1/2 cup cheddar cheese
- 1/4 cup chopped peppers (optional)
- 1/4 cup oil for crusty bottom (optional)
- Preheat the oven to 350F (See note 1 for how to get a crust on the bottom).
- Mix in a bowl the 1 1/2 cups of self rising cornmeal, 2 eggs, 1 cup of creamed corn, 1 cup sour cream, 1/2 cup salad oil, and the peppers (optional).
- Place half the batter in a cast iron skillet or a baking dish. I used a 10″ x 2″ round cast iron skillet.
- Sprinkle 1/4 cup of cheddar cheese.
- Add the rest of the batter.
- Bake for 20 minutes.
- Add the rest of the cheese to the top and bake for 15 more minutes.
- Let rest for 10 minutes and serve.

The post THE MOST DELICIOUS SOUTHERN CORNBREAD RECIPE EVER appeared first on Tastes so fine.
]]>The post CHORIZO AND EGGS BREAKFAST TACOS appeared first on Tastes so fine.
]]>
I’ve got a lot of chorizo in my fridge right now, but I’m confident it won’t go to waste since there are so many ways to use chorizo. I can’t wait to share more delicious recipes with you soon, but for now let’s get started with this one: It’s one of my favorite chorizo dishes for breakfast tacos with scrambled eggs and homemade salsa or pico de gallo to garnish.

You may find chorizo made out of pork, beef or soy and you can use whichever one you prefer. I’ve often used pork, but also enjoy the soy chorizo very much. The flavors and consistencies from chorizos of different countries can vary. Spanish chorizo is more like a salami– already cooked or smoked and finely-ground. Mexican chorizo is more like sausage– a little more loosely-ground and raw. Even though I know this recipe will be yummy with Spanish chorizo, my personal preference and recommendation is of course the Mexican kind.
To prepare this dish I fry the chorizo with 1 tablespoon of oil. Make sure to take the chorizo out of the casing if it has one.
Once it’s cooked I add a little bit of diced onion and diced tomato to add extra flavor and fry for a few more minutes.

Then, I reserve it on a plate and scramble the eggs in the same pan I cooked the chorizo. The oils left over from the chorizo add flavor to the eggs.
I enjoy serving the chorizo and eggs on homemade corn tortillas. That’s really all you need, but for the extra special touch you can always add some Mexican cream and fresh cheese (queso fresco), and of course your favorite salsa.
Delicioso!!!
- Mexican chorizo (2.5 ounces or 70 g per serving or per person) (or 1/2 cup of chorizo per person)
- 4 eggs
- 1/3 cup diced tomato
- 1/4 cup diced yellow onion (or the onion that you like best)
- Pico de gallo (the quantity of your preference)
- Tortilla (depending on how many tacos you want )
- OPTIONALS: Mexican fresh cheese (queso fresco), and/or cilantro.
- Cook the chorizo in a hot pan at medium high heat.
- Once it starts to cook add the tomato and onions, fry for 1 more minute.
- Reserve the cooked chorizo on a plate.
- In the same pan you used to cook the chorizo, add the 4 eggs and scramble until cooked.
- To assemble, place a spoon full of scramble eggs on a tortilla and top with a spoonful of chorizo and pico de gallo or homemade salsa.
- Enjoy!

The post CHORIZO AND EGGS BREAKFAST TACOS appeared first on Tastes so fine.
]]>The post Chicken mole (Chicken with Mexican chocolate sauce) appeared first on Tastes so fine.
]]> Here’s a very popular and economical dinner dish that is easy to make, which is why so many people commonly serve it at Mexican special events: Chicken Mole (pronounced Mole-eh in English).
Things I love about this dish: One, is that you can make the delicious mole sauce ahead of time and freeze it. Just get it out of the freezer and warm it up a little in a pan when you’re ready for it. Also, the only thing you do to the chicken is boil it! That’s it! About ten minutes in a pot and it’s done. Super easy! Finally, it really is perfect for when you have guests coming over and need to serve a hungry crowd.
Here are the simple steps:
First, you want to make sure you use chicken with bones still in it, such as a whole chicken, thighs with bones, breasts with bones, etc. It adds to the juiciness of the chicken.
Next, put your chicken in a pot, fill it with water, and boil until cooked (this shouldn’t take long).
While you’re waiting on the chicken to boil, you can heat up your pre-made chocolate mole sauce in another pot or pan.
Transfer the cooked chicken into the sauce pan and coat it completely with the sauce. Let the chicken soak up the savory flavor of the mole. Let it continue to simmer for about five minutes over medium low heat and it’s done. I love to serve it with rice and tortillas.
My husband’s official chocolate-lover review of this recipe: “MMMMmmmmmmMMMMMMMM!!!”
Enjoy!
- Chocolate mole sauce
- Chicken skinless breasts, legs and thighs with bones (some people like the skin, you can decide on that)
- Place the chicken in a large pot.
- Cover with water.
- Bring to a boil until the chicken is cooked, 15-30 minutes depending on the size of the chicken.
- In another sauce pan heat the chocolate sauce over medium heat.
- As soon as sauce warms up add the cooked chicken and simmer for about 10 minutes to let the chicken soak up the flavor of the sauce.
- Enjoy!

The post Chicken mole (Chicken with Mexican chocolate sauce) appeared first on Tastes so fine.
]]>